Sewing knits on your sewing machine - Tips & Tricks


I've owned a serger (or overlocker) from when I started sewing, so I've mostly been able to use a serger instead of a sewing machine. That being said, I have used a sewing machine on knits (hemming, attaching elastic, sewing underwear, topstitching, etc.) So below are a few tips and tricks from my experiences working with knits.
The key to good results is taking the time to test what stitches and needles work for your chosen fabric. I can’t stress this enough, but testing is essential! So test, test and test again. Below are some tips and starting points for your tests.
There isn't one way of doing this, so you'll have to find out what works best for your project and play with the settings of your sewing machine, and I say play because I think that's the best approach! have fun and get acquainted with your sewing machine.
TEST
If you see grinning or a ladder when you pull the side seams apart you need to adjust the tension. Some grinning will always happen when you pull the sides open, but when you let go the stitching should spring back to normal. Unless you have a walking foot it might be necessary to lower the tension on the presser foot to avoid wavy seams or rippling. Make notes as you adjust the tension and always turn in small increments.I find it helpful to think of the screw as a clock and only turn 10 minutes at a time. If there is a bit of rippling on a hem or waist seam, keep in mind that you probably won't see it when you are wearing your piece because they will be stretched while it's on you.
UNIVERSAL VS. STRETCH / BALLPOINT NEEDLES
When sewing knits, skip the universal needle, because there is a risk of holes and skipped stitches. So If you don’t already own them, buy both stretch as well as jersey needles so you can compare results.
When I was comparing universal to ballpoint and stretch needles on the sport Lycra and the modern jersey (both from Spoonflower btw) I haven't seen any holes when using a universal needle even so, skipped stitches were very common. Now my test were on small swatches, so you can imagine there would be quite a lot of skipped stitches on a longer seam.
That being said, here is an example of a 100% cotton jersey I bought years ago that was a nightmare to work with. I've used different needles in this sample to show you there was a big difference between some of the needles, but I never managed to get it right. I ended up using the jersey for sampling so it wasn't wasted, but it was super frustrating. Luckily this happened only once in 18 years of sewing and production.
As you can see there are a lot of holes using the universal needle and the ballpoint needle. The stretch needle was the best match, but even though you can hardly see it there are still a few tiny holes. Fun times indeed.
WHAT STITCHES TO USE
All you need is a stitch that stretches, like a zigzag stitch, so if this is all you have...you can sew knits! Chances are that your machine has a few other stitches to choose from. Try them on your chosen fabric to decide what’s best for your project and preference. I’ve compiled a list with just a few of the possible stitches and their uses. Play with stitch length and width to find the sweet spot.
Make sure you make notes as zig zag different lengths and widths and pull firmly to check if your preferred settings have enough stretch.

SEAMS
A narrow zigzag stitch is a great starting point for your seams, however, if you have other stitches such a as the ones below, try them because they are stronger. The downside of these stitches is that they are a pain to unpick, so if you are unsure of the fit use a basting stitch first:
- Zigzag stitch. Here are a few settings to start from when you are swatching.
Super stretchy fabrics:
- stitch length 1 -1,5 mm (17 – 25 SPI)
- zigzag width 2 – 3
Stretchy fabrics:
- stitch length 2 – 2,5 mm (13 – 17 SPI)
- zigzag width 0,5 -1
- Three-step zigzag stitch
- Lightning bolt stitch
- Straight stretch stitch
- Overlock stitch
HEMS
When you are hemming knits on your sewing machine there is a big chance the result will be wavy. If you can adjust the tension on your pressure foot or use a walking foot to get a flat result. Another option is to stabilise the hem first with a fusible interfacing or wonder tape which washes out after you are done.
- Zigzag stitch
- Twin needle, emulates a coverstitch by creating two lines of stitching.
- Raw edge. It’s an option to leave the edges raw, since knits don’t fray like wovens do, however this option is less durable and edges can and will roll over.
- Hand sew the hem using a blind hem stitch.
An example of the raw edges i used on the neckline for a dress. I think it worked well for the dress and this fabric. the neckline in the back did roll, but i didn't mind. This dress was a quick make, but held up well over the years.
If you use a raw edge, you can hand tack the seam to one side.

Sewing by hand can be a great option for the more delicate knits like the crepe knit fabric I used in this dress. I did a single fold and did a blind stitch over the raw edge. The stitches are very loose to give it enough stretch. I like that you can see the tiny stitches on the outside of the hem even if they aren't perfectly aligned.


I've regularly left edges raw on more delicate and less stable knits to avoid twin needles and I've also use the rolling effect as a design feature in the Elskan dress / top. The front waterfall nekline is left raw and gives a nice rolling effect. The grey stretch cotton jersey handles the raw edges well even on the sleeve hem, where there is a lot more wear and tear. All in all leaving the edges raw isn't just a great short cut!

ATTACHING ELASTIC
- Zigzag stitch
- Three-step zigzag stitch, is a strong and stretchy stitch, a top pick for attaching elastic.
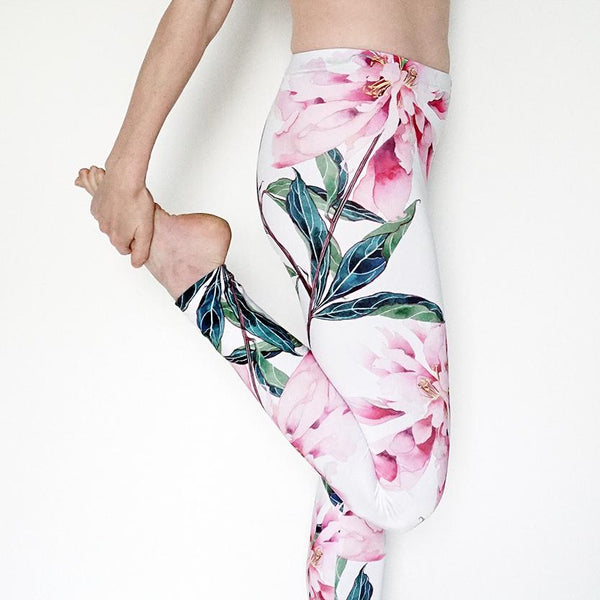
Here you can see a detail of an elasticated waist of a legging. I've attached the elastic with a three-step zigzag stitch and topstitched with the same stitch. It's a strong and stretchy stitch and very handy when attaching elastic to a legging for example.
 This is a great option if you are sewing a pair of leggings like the Parsec leggings
TOPSTITCHING
Great for adding strength and detail. to your garment., however it also adds more thread so check if you like how it feels against your skin. In addition, topstitching stitches are often more complicated stitches, therefore they take a lot longer, use more thread and they are harder to unpick.
Before topstitching, trim the seam allowance to about 0,7 cm / 1/5”. You can either open the seam or fold to one side. You can use any stitch you like as long as it has a sufficient amount of stretch, for example:
- Zigzag stitch
- Three-step zigzag stitch
- Straight stretch stitch
- Overlock stitch
- Stretch knit overlock
- Closed overlock
- Featherstitch
- Honeycomb stitch
As you can see with this closed overlock stitch there is a big difference in how it looks with different settings. On the left too big and wide, but on the right it was just right, this was my favorite.

Here is an example of the feather stitch. First I did a straight stretch stitch, opened up the seam and toptstitch on the right side of the fabric. On the top left you also see a test with the three-step zig zag which gives a nice thick zig zag.

These three swatches show a lot of different settings and stitches.
- On the top, honeycomb stitch and the overlock stitch, both look a it off
- In the middle, feather stitch, witch stitch (translated that one from my Dutch manual) and the honeycomb stitch with different settings.
- The honeycomb stitch with different settings.

The stitches below might not be that common, I've only seen them on one of my Pfaff sewing machines, but I like the look.
- Top: Witch stitch (translated that one from my Dutch manual) + Cover stitch ( also translated from my Dutch manual).
- Cover stitch ( translated from my Dutch manual)

Here you see I used a different colour in the back, so that I could check the tension. As you can see the seam is opened up before topstitching.

STITCH SYMBOLS
Because your machine might have slightly different names for the stitches I've mentioned, here are a few of the stitch symbols for reference. I've left out the ones that were specific to one of my machnines. In the end it all depends on what your machine has to offer.
Happy sewing!
Charlotte
PS: looking for a fun and free sewing project? Sign up to the newsletter for a free copy of the smallest Tsuno Tie Bag and sew up some scraps. If you sign up you also get access to the free printable swatch library, sewing project planner and a few other handy templates. You'll receive the files in your welcome mail :)