5 steps to pick the right sewing pattern size + get a better fit. Even if you are a beginner!


Yay! You decided to start sewing. You bought a sewing machine, did a few practice projects and now you are ready to sew your own handmade wardrobe. You want to create your own handmade wardrobe because fast fashion turns you off, you can't find what you are looking for or you simply don't fit the standard RTW (ready-to-wear) sizes.
You pick your first pattern put your blood, sweat, and tears into that first garment, only to find out it's too baggy or too tight and you start second guessing the whole plan of sewing your own wardrobe.
Or
You never start because you lack confidence and question everything...Which pattern size should I choose? What should I do if I don’t fit into any of the listed sizes? What if I fall into different sizes? How do I take my measurements?
Feel the sewing overwhelm coursing through your veins yet?
You don't want to start from scratch and you want some answers...
Well, here are some answers, because there is never just one final answer when it comes to sewing. However, you can make an educated choice before you even touch your sewing machine, trace a pattern or cut into your final fabric.
What size should I sew?
One of the questions I get most often is: "I'm a size M in RTW, which pattern size should I sew?". And my answer always is: "You HAVE to take body measurements, because "one does not simply" compare RTW sizing to sewing pattern sizing."
Both RTW companies and sewing companies, use their own set of body measurements to create their garments and sewing patterns. Often these measurement charts are tailored to their specific client base. Therefore, if you sew the pattern right out of the envelope/magazine/PDF with no alterations, the only difference between fast fashion and your handmade creation is that it's made with your blood, sweat, and tears instead of a seamstress somewhere around the world.
So if I could persuade you to do one thing before you start is to take these five steps before you pick a size and cut into your final fabric.
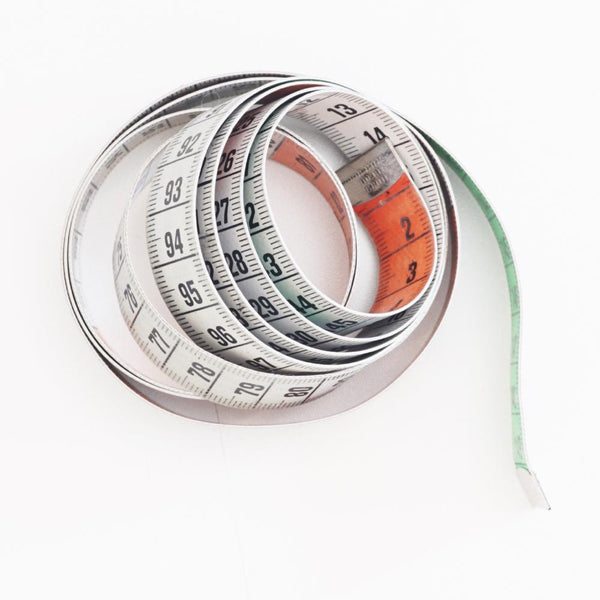
1. Measure your body
Measure your body over your underwear, that means wearing the bra you are most likely to wear with the garment. Then compare your measurements against the body measurements in the pattern. Full bust, waist, and hip are the most common measurements you'll encounter.
How to measure yourself for sewing?
Take measurements over underwear. Stand up straight and don´t hold your breath ;)
The tape measure should fit snug around your body without being too tight or too loose. Hold it comfortably and horizontally.
Bust – measure around the fullest part of your chest and wear the type of bra you are most likely to wear with the finished garment.
Waist – measure the thinnest part of your waist and don't hold your breath ;)
Hips – measure around the fullest part of your hips. Create a loop with the tape around your hips and slowly slide it down your hips, loosening the tape measure when necessary.
Now compare your body measurements against the body measurements chart in the sewing pattern.
2. Measure the pattern / use the finished garment measurements
Measure the paper pattern in the same places you've measured your body measurements (bust, waist, hip) and subtract seam allowances to determine the ease or check the finished measurement chart if it's included in your sewing pattern.
Ease is the room in the garment that allows you to move, breathe and sit. Every designer and company have their own approach to this, and that's why you need to check this before you pick a size.
For example: If you fall in between sizes and there is quite a lot of ease in the pattern, you can confidently size down to the smaller size.
I wrote a blog recently explaining ease if you want to know more about the topic, it also includes some ease reference charts, so you can get an idea of how much ease is added to patterns in general.
3. Measure your closet
I'm sure you own a few RTW pieces that fit you perfectly and if you measure the garment, it will give great clues determining the size, and the ease you prefer in your garments, and which alterations you'll need to get the fit you want.
Go for items that are similar to the pattern you want to sew. So measure wovens if your pattern calls for wovens, and measure knits if your pattern calls for knits.
Alternatively, a garment you don't like will also give you valuable information. If you own a top that is too tight, too short or too long then check this against the pattern of your choice.
For example: If you measure the waist, bust, and hip of a top that is a bit too snug, you can now check that measurement against the finished garment sizes. If the patterns finished size is similar, you can go up a size or add a wider seam allowance so you could let it out a bit.
Bonus tip: Don't own a garment similar to the style you want to sew?...go "shopping" and by shopping I mean, Take your tape measure and leave your wallet at home! If you are about to sew a style you've never worn before, try it before you sew it. There have been many times where I thought a certain style might suit me when it didn't...I'd rather find this out in a changing room, than in front of the mirror in my sewing room.
Now compare the measurements from the first three steps to choose the right size or sizes, if you fall between different sizes in different areas. Since the picking the right size is only a starting point, you are now ready to implement some early adjustments.
4. Modify the pattern
Fitting can be daunting, but you can make minor and simple modifications to the pattern before you sew your garment or make a muslin. For example, you can grade between sizes, lengthen or shorten the pattern slightly.
How to grade between sizes? If you fall between sizes you can blend different sizes. You can trace and incorporate different sizes. Just trace from the size 10 bust toward the size 8 waist, and the size 12 hip in a nicely curved line. You will need to do this for both the back and front panel.
After you've done a few projects you'll have a better understanding of which general modifications you'll need. For me, it's always lengthening sleeves + pants, and maybe a full tummy adjustment. An example of a very common and well-documented alteration is an FBA (full bust adjustment) for those with a cup size over B/C since most patterns are drafted for a B cup.
5. Make a muslin (toile/sample)
After making a few standard or minor alterations, sew up a muslin. Test the fit in an inexpensive fabric or use old bed sheets. If possible, use a fabric that has the same drape and feel of your final fabric. Don't worry about finishing the seams or hems (unless you are checking the length ), you just need to get an idea of the fit and what adjustments you need to make.
I know fitting a garment can seem daunting, however, sometimes an alteration can be as simple as lengthening or shortening a sleeve by a few centimeters or inches.
If you encounter bigger fit issues, and don't know where to start...connect with the hive mind on The Fold Line group on Facebook or the Patternreview forum. If you share a photo of you wearing your muslin people are more than happy to help you figure out what the name of the issue is so you can find videos and tutorials online, and people will often share their favourite tutorial for a specific fit issue.
Formula for future projects
Taking these five steps will give your next sewing project a good foundation for a successful outcome.
Maybe it sounds like a ton of work, but documenting your body measurements, the measurements of your favourite garments and their ease, will help you build a formula to use on future projects.
We talk about sewing, but in reality, the magic is in the hours of prep work.
Before I sign off one final note. If you are discouraged or overwhelmed, don't worry too much about perfecting the fit when you are just starting out. Even with some small adjustments, you are probably getting better results than you are when buying ready to wear garments. And don't forget you will be moving around and most people will never notice a dragline here and there, they are most likely in sheer awe of the fact that you made it!
Happy sewing,
Charlotte
PS: looking for a fun and free sewing project? Sign up to the newsletter for a free copy of the smallest Tsuno Tie Bag and sew up some scraps. If you Sign up you also get access to the free printable swatch library, sewing project planner and a few other handy templates. You'll receive the files in your welcome mail :)
